Posted on 2 Comments

Writer’s Kitchen: Food Bloggers Getting Book Deals

Books

It’s a pretty exciting week for food bloggers. In the past week two of my favorites have announced book deals! Last Thursday, Hannah Queen told her readers over at Honey & Jam that she is now working on writing and photographing a cookbook of cake recipes, tentatively called Farm to Cake (Spring 2015, Stewart, Tabori & Chang). Then today I read over at Not Without Salt that Ashley Rodriguez is living her dream of writing a cookbook of her own, this one a celebration of her marriage with menus and recipes inspired by her Dating My Husband series (to be published around Valentine’s Day 2015 by Running Press). How cool is that? There’s nothing new about food bloggers getting book deals–it’s been happening for a number of years now–but these two are some of the most deserving and I know their books are going to be gorgeous, well-written, and trustworthy.

One final note: One of the great things about food bloggers announcing book deals is that they often do it by sharing a celebratory recipe. Hannah does so with Carrot Cake with Honey Cream Cheese Frosting and Ashley shares the news with Ice Cream Cake with Chocolate Wafers, Hot Fudge, and Candied Cocoa Nibs. So check out their blogs, salivate over the delicious-looking photos, and drop them a note encouraging them in the process–after all, as all writers know, it’s a huge endeavor and the readers part of what helps keep authors going.

Cheers to you both, Hannah and Ashley!

Posted on Leave a comment

Writer’s Kitchen: Last-Minute Holiday Appetizers

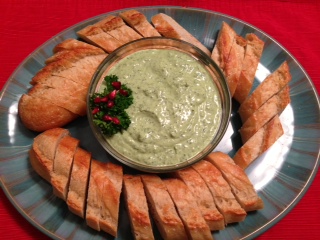
Yesterday we covered last-minute host/hostess gifts, and today we have the answer to what to bring to a potluck when you’re strapped for time (perfect for when you’re on deadline!). Served with baguette slices and endive leaves, a Caesar salad-flavored dip will be a hit. And who wouldn’t enjoy the salty, briny flavors of baked feta cheese topped with warm olives? Keep reading for the recipes–complete with a last-minute trip the grocery store, you’ll have both recipes ready about two hours from now!

Caesar Cream

Caesar Cream
Adapted from Simply Classic

2 garlic cloves
1/2 cup grated Parmesan cheese
1/2 cup packed fresh parsley
6 canned anchovy fillets
3 tablespoons freshly-squeezed lemon juice
1 cup sour cream
Sliced baguette, for serving
Endive leaves, for serving

Combine garlic and Parmesan cheese in a food processor until combined. Add parsley, anchovies, and lemon juice, and process until the mixture takes on a paste-like consistency. Turn into a bowl and fold in sour cream until combined.

Serve with baguette slices and endive leaves.

Serves 12.

Baked Feta and Olives

Sexy Baked Olives & Feta Cheese
Adapted from Dishing with Kathy Casey

1 1/2 cups mixed imported olives, pitted and drained
1 tablespoon fresh thyme leaves
2 teaspoons grated lemon zest
1/4 teaspoon dried red pepper flakes1 teaspoon fennel seeds
2 tablespoons extra virgin olive oil
1 thick 8-ounce piece of feta cheese
Pita chips, for serving

Preheat oven to 400 degrees F.

Combine all ingredients except cheese and pita chips in a small bowl. Lightly oil a medium-sized cast-iron skillet and place the cheese int he center. Top the cheese with the olive mixture, taking Kathy Casey’s advice to use a spatula to scoop out all the oil and seasonings.

Bake for 20 minutes and serve out of the pan with pita chips.

Serves 10-15.


Posted on Leave a comment

Writer’s Kitchen: NaNoWriMo, Voting, & Gâteau Breton

Who really thinks of baking a cake at 9:15 p.m. on the first day of NaNoWriMo? Me! I made it to 1,736 words the morning of November 1–which exceeded the necessary daily average word count by 69–so maybe it was no big deal. But considering some days will be too busy to write at all, perhaps it’s a good idea to stock up on words when I have time. But instead, I baked a cake. And then voted–and not even at the last moment! If my NaNoWriMo participation is anything like voting, that means I’ll won’t be cramming too hard to meet the 50,000 word count by November 30–just a little. Probably while baking a cake.

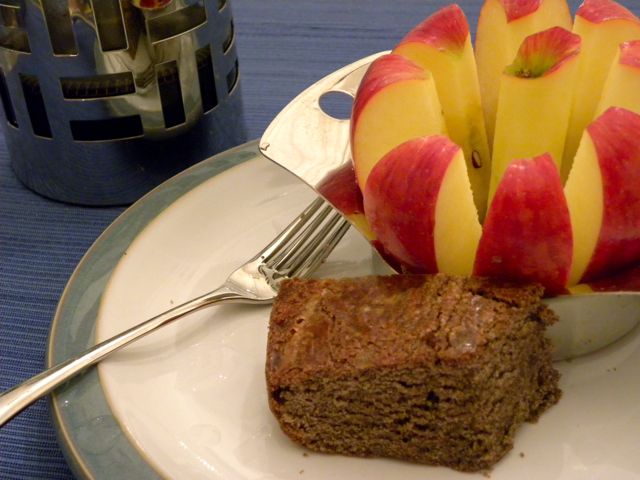
Buckwheat Gâteau Breton with Sea Salt
Adapted from The Sweet Life in Paris by David Lebovitz

I came across this cake while reading The Sweet Life in Paris, and I’m so glad I tried it. The buckwheat and sea salt add a fun complexity to an otherwise classic cake.

Cake:
7/8 cup buckwheat flour
1 cup all-purpose flour
1/2 teaspoon fleur de sel or other medium-grain, light-tasting sea salt, plus 1/3 teaspoon
1/4 teaspoon ground cinnamon
1/2 pound unsalted butter, brought to room temperature
1 cup sugar
4 large egg yolks
1 large egg
3/4 teaspoon vanilla extract
2 Tablespoons dark rum

Glaze:
1 large egg yolk
1 teaspoon milk

Preheat the oven to 350 degrees and butter a 9-inch springform cake pan. Combine both flours, 1/2 teaspoon of the salt, and the cinnamon in a bowl and whisk together until combined. Set aside. Beat the butter with a stand mixer until light and airy, then beat in the sugar until smooth.

Next, put four egg yolks, one whole egg, vanilla, and rum in a separate bowl and beat with a fork. Turn the mixer on high and slowly pour the eggs into the batter, allowing the batter to take on an airy consistency.

Add the flour mixture to the batter, stirring just until incorporated, then pour the batter into the pan. This batter is stickier and denser than many so it’s a little harder to work with, but do your best to smooth out the top.

Mix the egg yolk and milk for the glaze, then brush it over the top of the cake, using as much as necessary. Run the tines of a fork across the top in a few parallel lines, then rotate a little and repeat, to create an uneven crisscross effect. Sprinkle the remaining 1/3 teaspoon of sea salt evenly over the top. Bake for 45 minutes and let cool in the pan before removing.

Serves 14-16.

Posted on 5 Comments

Writer’s Kitchen: Homemade Marshmallows

We may have had a mild summer here in Seattle, but these sunny, mild October days almost make up for it. I’ve only had to wear a coat on one or two occasions so far and am still in the transition phase of my wardrobe.

However, the mornings are getting crisper and starting to bring in their blankets of fog. And that means it will soon be time for cozy fires in the fireplace, lush scarves and coats, and steaming mugs of hot chocolate.

Curling up in front of the fireplace with a hot beverage is such a pleasant way to spend an autumn evening. On those nights when you don’t feel like writing, consider this: Would lounging with your laptop or composition book and a mug of hot chocolate do the trick?

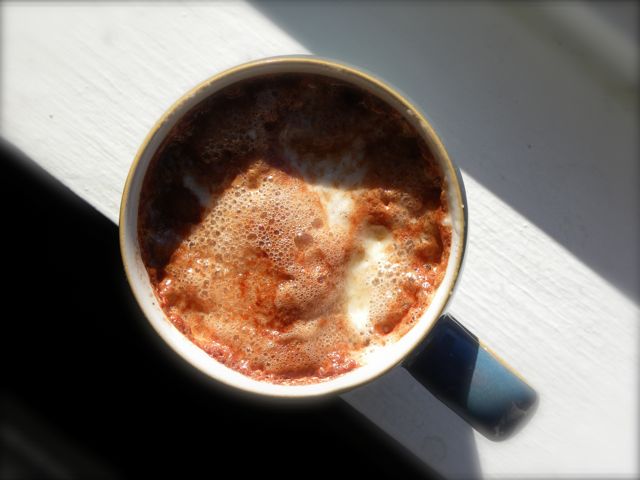
What if the hot chocolate were topped with homemade vanilla marshmallows that have collapsed with the heat into a silky, pillowy cover?

Homemade marshmallows last for weeks and are fun to make. Having a batch of them in the kitchen will enhance any hot chocolate, giving you a decadent treat in minutes. You work hard as a writer. Little touches like this can add a bit of joy to your work.
Homemade Vanilla Marshmallows
Recipe adapted from Not Without Salt and Alton Brown

These marshmallows melt nicely, giving your hot chocolate a fluffy, almost foam-like topping. Roasted over a campfire, they also make the best s’mores I’ve ever tasted. Tip: When making candy, read the recipe thoroughly before you start, and make sure to measure and prep the ingredients in advance.

3 packages unflavored gelatin
1 cup cold water, divided
1 1/2 cups sugar
1 cup light corn syrup
1 teaspoon kosher salt
1 vanilla bean
1/4 cup confectioner’s sugar
1/4 cup cornstarch
Nonstick baking spray

Using the tip of a sharp knife, score the vanilla bean lengthwise, opening up the pod and scraping out all the seeds. Set the seeds aside, reserving the pod for another use.

Prepare the gelatin by sprinkling it into the bowl of a stand mixer with 1/2 cup water.

Meanwhile, mix the sugar, corn syrup, and salt with the remaining 1/2 cup water in a small saucepan. Cook, covered, over medium heat for three to four minutes. Uncover and keep cooking until the mixture reaches 240 degrees F on your candy thermometer. Watch carefully and be patient; it may seem like it’s taking a while, but you want a precise temperature, and it may continue to climb when you remove it from the heat.

Using the whisk attachment, turn the mixer on low speed and gradually pour the syrup into the gelatin. Turn the speed up to high and add the vanilla seeds. This is where the mixer starts to do all the work. Keep it going on high for about 12 to 15 minutes, until it’s lukewarm and very thick.

Meanwhile, combine the confectioner’s sugar and cornstarch. Line a 13 by 9-inch baking pan with foil paper, then spray with your baking spray. Pour the sugar and cornstach mixture into the pan and shake it around as if you were buttering and flouring a pan. Pour the mixture back into the bowl; you’ll need it for the top of the marshmallows.

When the marshmallow mixture is ready, pour it into the pan. It will be very sticky and seemingly hard to work with, but if you use a lightly-oiled spatula you’ll find it easier to spread. Once the mixture is spread evenly into the pan, sprinkle the cornstarch and sugar on top, using as much as needed and reserving the rest.

This is where you need to be patient. The marshmallows need to sit for at least four hours. If you do this stage a day before you need the marshmallows, you can finish them the next day.

Using a pizza wheel, cut the marshmallows into 1-inch squares. Dust with remaining sugar and cornstarch mixture.

Store in an airtight container.

Posted on Leave a comment

Writer’s Kitchen: Quick coconut cookies

My book group starts in just two hours and I have a delicious tarte Tatin in progress. However, I got to thinking, if I was low on time and still wanted to offer hospitality with some homemade baked goods, some Scandinavian coconut cookies would be a great alternative to a French tart.

With just four ingredients and no fancy cooking techniques (just measure, stir, form, and bake), they come together so quickly. That makes them perfect not only for company, but also for a sugar craving that might hit while you’re writing. Happy baking!

Coconut Cookies
Adapted from Aquavit

2 1/2 cups unsweetened, medium grated or shredded coconut
2 tablespoons unsalted butter
2 eggs
3/4 cup sugar

Preheat oven to 350 degrees. Heat butter in a small saucepan until melted. Remove from heat and stir in coconut. In a separate bowl, beat eggs to combine, then add sugar and beat until light and fluffy. Mix everything together and drop by rounded teaspoons onto a parchment paper-lined cookie sheet. Using the bottom of a glass, gently press down on each cookie to slightly flatten. Bake for 8 to 11 minutes, until golden.

Serves about two dozen.

Photo and recipe originally published on my blog Outside Oslo.

Posted on Leave a comment

Writer’s Kitchen: Absinthe Cake

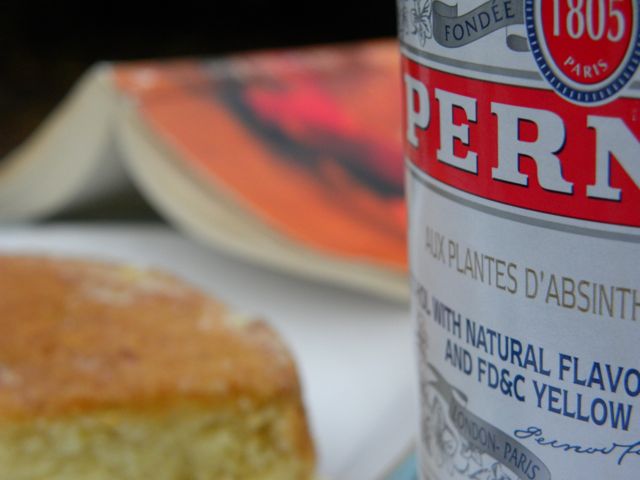
Absinthe Cake

Earnest Hemingway didn’t like to talk about writing. Fearing that talking about it would remove the magic, he chose to let the ideas and stories percolate in his subconscious after a day’s work.

However, what worked for Hemingway doesn’t work for everybody. Personally, sharing the writing process and experience with Sarah creates inspiration in itself. Whether we’re camped out with our laptops and working on our novels or just checking in on each other’s process and ideas while enjoying a glass of wine or a pastry, that community we share helps unblock a stalled story and creates accountability. And sometimes it’s just good to leave the writing behind for a while and share an experience. Like baking a cake.

Our husbands joke that we were separated at birth. In addition to the childhood subscriptions to Cat Fancy magazine and an uncharacterisic propensity toward loud, angst-filled music, we’re both passionate about two things: writing and good food. And we often find the two connecting in some way.

For example, cooking and baking are methodological. A recipe spells out the ingredients and steps, and when the instructions are followed, the result is a cake, loaf of bread, entree, or hors d’oeuvres ready to be enjoyed. Likewise, when ideas and writing tools are combined, the writer produces a poem, short story, article, or novel that may someday engage and delight readers.

We all have our own processes, whether we keep our lips closed on our book like Hemingway or work with a critique group to get feedback. Hemingway probably wouldn’t agree with my way of doing things, but given his time in Paris during the 1920s, I wouldn’t be surprised if he approved of this cake.

Absinthe Cake
Adapted from David Lebovitz’s The Sweet Life in Paris

3/4 teaspoon anise seeds
1 1/4 cups all-purpose flour
1/2 cup almond flour
2 teaspoons baking powder
1/4 teaspoon salt
8 Tablespoons unsalted butter (bring to room temperature)
1 cup sugar
2 large eggs (bring to room temperature)
1/4 cup whole milk
1/4 cup absinthe
Grated orange zest

For the glaze:
3 Tablespoons sugar
1/4 cup absinthe

Preheat the oven to 350 degrees. Prep a 9-inch springform pan by buttering it and then lining the bottom with a round of parchment paper.

Crush the anise seeds with a mortar and pestle, then combine with all the other dry ingredients and sift into a small bowl.

In another bowl, combine the milk, absinthe, and 1-2 teaspoons of orange zest; reserve the rest of the orange for another use.

Beat the butter and sugar, preferably in a stand mixer, until light and fluffy, then add eggs, one at a time, letting the first one become incorporated before mixing in the second.

Stop the mixer at this time and add half of the flour mixture. Stir briefly, then add the milk and absinthe.

Taking care to not overmix, add the rest of the flour mixture and stir by hand just until incorporated.

Pour the batter into the pan and gently smooth the top. Bake for about 35 minutes, using the toothpick test to determine when it’s done. Let it cool somewhat before removing it from the pan, and let cool completely before beginning the glaze.

When you’re ready to glaze the cake, liberally poke holes in the cake with a toothpick to help the glaze soak in. Stir the sugar and absinthe together in a smooth bowl, taking care so the sugar doesn’t dissolve. Brush the glaze over the top and sides of the cake, continuing until you use all the glaze.

Enjoy!