We may have had a mild summer here in Seattle, but these sunny, mild October days almost make up for it. I’ve only had to wear a coat on one or two occasions so far and am still in the transition phase of my wardrobe.
However, the mornings are getting crisper and starting to bring in their blankets of fog. And that means it will soon be time for cozy fires in the fireplace, lush scarves and coats, and steaming mugs of hot chocolate.

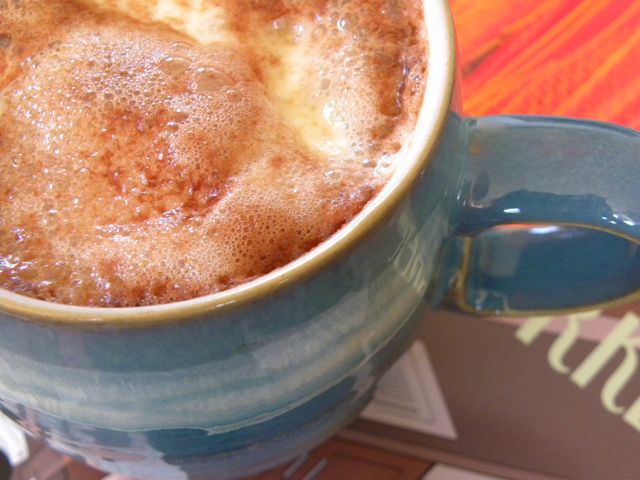
Curling up in front of the fireplace with a hot beverage is such a pleasant way to spend an autumn evening. On those nights when you don’t feel like writing, consider this: Would lounging with your laptop or composition book and a mug of hot chocolate do the trick?
What if the hot chocolate were topped with homemade vanilla marshmallows that have collapsed with the heat into a silky, pillowy cover?

Homemade marshmallows last for weeks and are fun to make. Having a batch of them in the kitchen will enhance any hot chocolate, giving you a decadent treat in minutes. You work hard as a writer. Little touches like this can add a bit of joy to your work.

Homemade Vanilla Marshmallows
Recipe adapted from Not Without Salt and Alton Brown
These marshmallows melt nicely, giving your hot chocolate a fluffy, almost foam-like topping. Roasted over a campfire, they also make the best s’mores I’ve ever tasted. Tip: When making candy, read the recipe thoroughly before you start, and make sure to measure and prep the ingredients in advance.
3 packages unflavored gelatin
1 cup cold water, divided
1 1/2 cups sugar
1 cup light corn syrup
1 teaspoon kosher salt
1 vanilla bean
1/4 cup confectioner’s sugar
1/4 cup cornstarch
Nonstick baking spray
Using the tip of a sharp knife, score the vanilla bean lengthwise, opening up the pod and scraping out all the seeds. Set the seeds aside, reserving the pod for another use.
Prepare the gelatin by sprinkling it into the bowl of a stand mixer with 1/2 cup water.
Meanwhile, mix the sugar, corn syrup, and salt with the remaining 1/2 cup water in a small saucepan. Cook, covered, over medium heat for three to four minutes. Uncover and keep cooking until the mixture reaches 240 degrees F on your candy thermometer. Watch carefully and be patient; it may seem like it’s taking a while, but you want a precise temperature, and it may continue to climb when you remove it from the heat.
Using the whisk attachment, turn the mixer on low speed and gradually pour the syrup into the gelatin. Turn the speed up to high and add the vanilla seeds. This is where the mixer starts to do all the work. Keep it going on high for about 12 to 15 minutes, until it’s lukewarm and very thick.
Meanwhile, combine the confectioner’s sugar and cornstarch. Line a 13 by 9-inch baking pan with foil paper, then spray with your baking spray. Pour the sugar and cornstach mixture into the pan and shake it around as if you were buttering and flouring a pan. Pour the mixture back into the bowl; you’ll need it for the top of the marshmallows.
When the marshmallow mixture is ready, pour it into the pan. It will be very sticky and seemingly hard to work with, but if you use a lightly-oiled spatula you’ll find it easier to spread. Once the mixture is spread evenly into the pan, sprinkle the cornstarch and sugar on top, using as much as needed and reserving the rest.
This is where you need to be patient. The marshmallows need to sit for at least four hours. If you do this stage a day before you need the marshmallows, you can finish them the next day.
Using a pizza wheel, cut the marshmallows into 1-inch squares. Dust with remaining sugar and cornstarch mixture.
Store in an airtight container.


there’s been a small part of me nagging away at the rest of me to make espresso flavoured marshmellows…
you know so you can have a hot chocolate but get that mocha fix.
yours have definitely sealed that little nagging thought of mine 🙂
Glad to hear we’ve inspired you! Let us know how your espresso marshmallows turn out–they sound wonderful!
What a great way to add some flavour to an old treat. I’m going to have to whip some up for my nephews after their Halloween buzz wears off. Thanks for the post.
awesome post!! :):) check me out…
http://roses-are-blue.blogspot.com/
kisses x
These do look good! Thanks for the visit. I’ll have to try these someday! ; )